Create custom objects and fields in the Skedulo Pulse Platform
Skedulo Pulse Platform customers can create custom objects and fields directly in the Skedulo web application. This automatically maps the objects and fields to your GraphQL schema so that you can easily create queries and mutations for use in web extensions or remote querying.
Note that custom objects and fields in Skedulo for Salesforce must first be created in Salesforce and then mapped in the Skedulo web app. See Creating custom objects in Salesforce for more information.
Important
To perform the actions described on this page, you must be logged in with a user that has the required permissions to create custom objects and fields.Create a custom object
The instructions below use hypothetical Vaccine and Supply objects to demonstrate the steps involved in creating objects and fields.
To create a custom object, do the following in the Skedulo web application:
-
Click your user profile in the upper-right corner, then select Settings > Data management > Objects & fields.
-
Click Create custom object.
-
Provide an
Object label,Object name(this must be unique in the system), andObject description. In this example, we are creating theVaccineobject: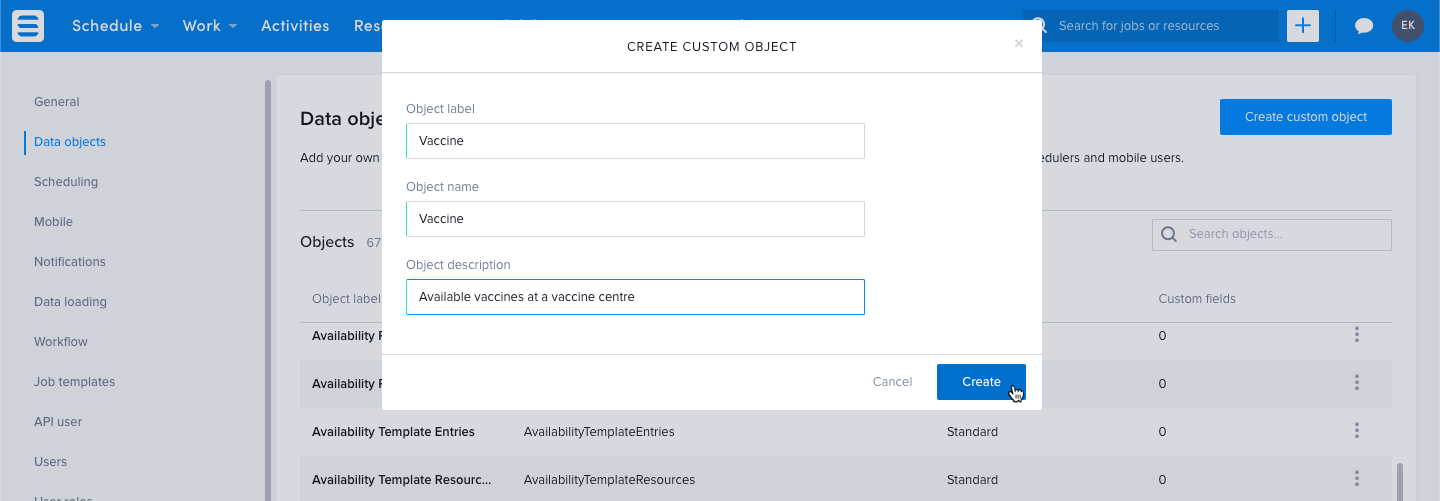
-
Click Create. The object is created and added to the list of objects on the Objects and fields page.
Create custom fields
All objects that are created in the web app have a UID field that is unique for each record created. In this example we are creating a custom Name field on the Vaccine custom object and a field to link the Vaccine to the Job object. By doing this, we are making it possible for named vaccines that are administered to be associated with specific jobs. For more information about how fields that link objects together work, see .
-
In Settings > Objects and Fields, locate and click your new custom object’s name.
-
On the object details screen, click Add custom field. The Create Custom Field wizard displays.
-
Select the
Textfield type and then click Next.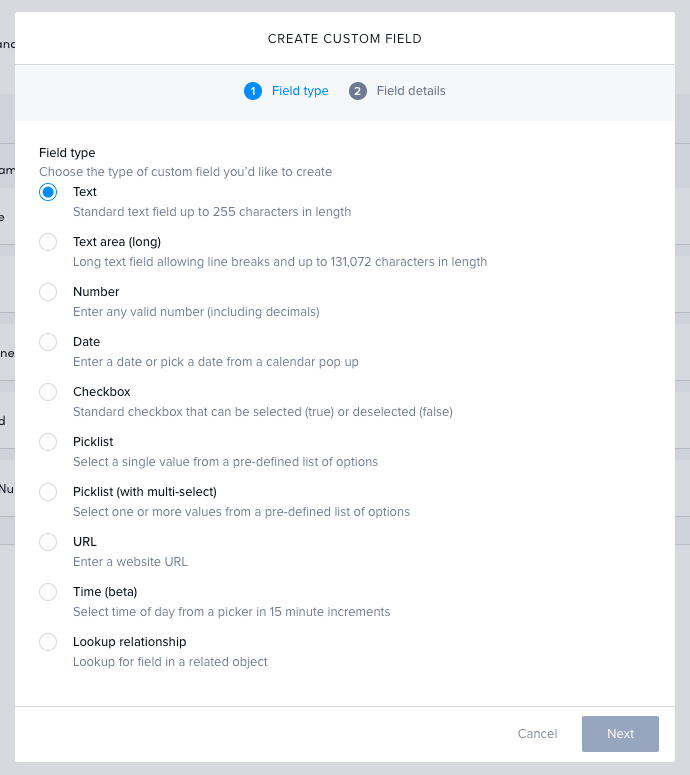
-
Complete the required information for the
Namecustom field, then click Create.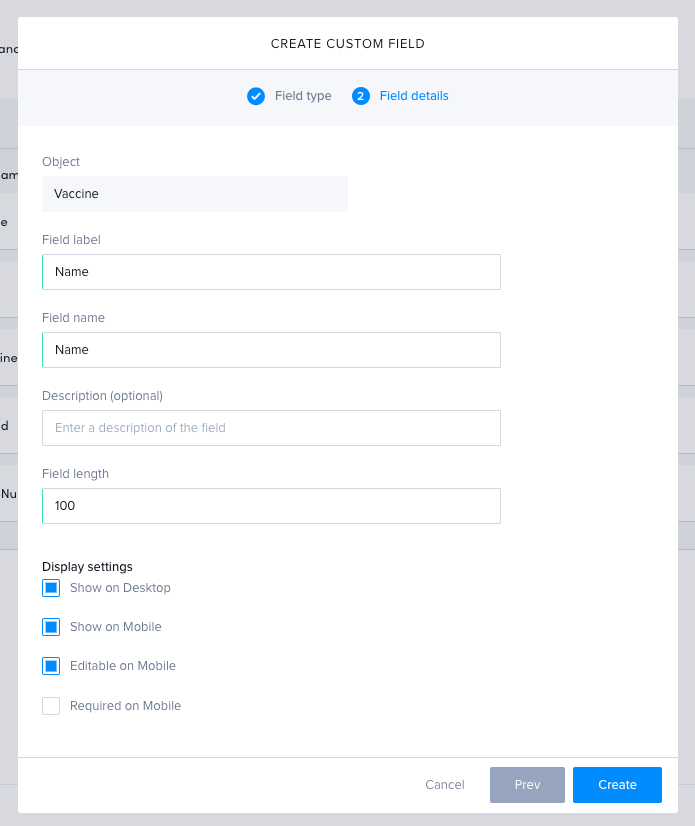
-
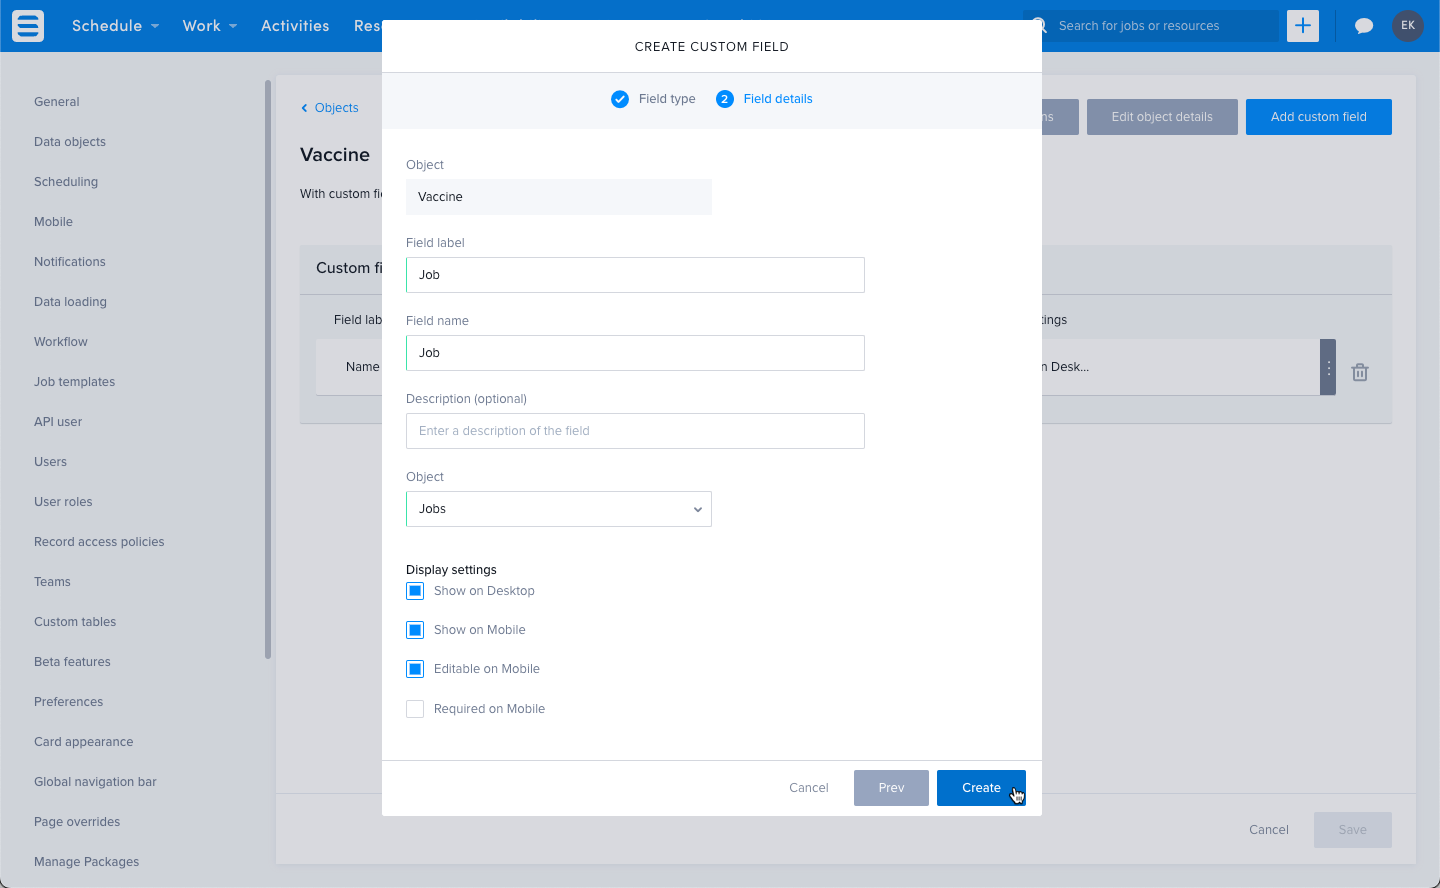
Create another custom field and select
Lookupfor the field type on the first page of the wizard, then click Next. -
Enter
Jobinto theField labelandField namefields. -
From the Object dropdown list, select
Jobsas the object for which you are creating the lookup relationship. -
Select the display settings you want, then click Create.
Additional fields can be added depending on what makes sense for your use case. In this example, Brand and Number of doses could also be added.
Note that additional configuration is required if you want the custom fields to appear in a list view. For more information on how to do that, see the list view documentation.
Note
If you are using the Pulse Scheduling Experience, you may need to configure the swimlane card styling for the new field. For more information, please see Pulse Scheduling Experience card styling documentation.Create additional objects to capture complexity in your use case
This example can be extended to create another custom object that has a lookup relationship with our Vaccine object. In this scenario, it could make sense to create a Supply object that provides information on the availability of a specific vaccine at a job site.
To create a Supply object and link it to the Vaccine object, do the following:
- On the Objects and fields page, click Create custom object.
- Create the
Supplyobject using the following information:
- Object label:
Vaccine supply - Object name:
Supply - Object description: Availability of a vaccine at a specific site Click Create.
- As before, select the
Supplyobject from the list of objects on the Objects and fields page and click Create custom field. - Select the
Textfield type, then click Next. - Enter
Nameinto theField labelandField namefields. - Create another custom field for the
Supplyobject with theLookup relationshipfield type. - Enter
Vaccineinto theField labelandField namefields. - From the Objects dropdown list, select
Vaccineas the object for which you are creating the lookup relationship. - Select the display settings you want, then click Create.
Any other fields that are required can be added; in this example Current stock and Date of stock count could also been added.
These objects are now part of your team’s data model and can be used in web extensions to provide custom functionality for your use case.
Feedback
Was this page helpful?