Configure custom views for the Pulse Allocation Experience
Important
This feature is only available on the Skedulo Pulse Platform when the Pulse Allocation Experience extension is installed.Overview
The Pulse Allocation Experience provides and enhanced allocation workflow for schedulers when allocation resources to work items. For more information about the Pulse Allocation Experience, please see the user guide.
Prerequisites
The following are all required to be able to perform the actions described in this document:
- The Pulse Allocation Experience is installed.
- The Use the Pulse Allocation Experience setting is enabled. See the settings documentation for details.
- Users have the Administrator role.
View existing allocation views
The Pulse Allocation Experience comes with some views preconfigured. The Allocation views setting page allows you to access these as well as any custom views that have been created.
To see the views that are already configured in your team, do the following step:
- Navigate to Settings > Scheduling > Allocation views. The Allocation views page opens with a list of views displayed.
Create a new allocation view
To create a new allocation view, do the following steps:
- On the Allocation views settings page, click Create allocation view.
The Create new allocation view page displays.
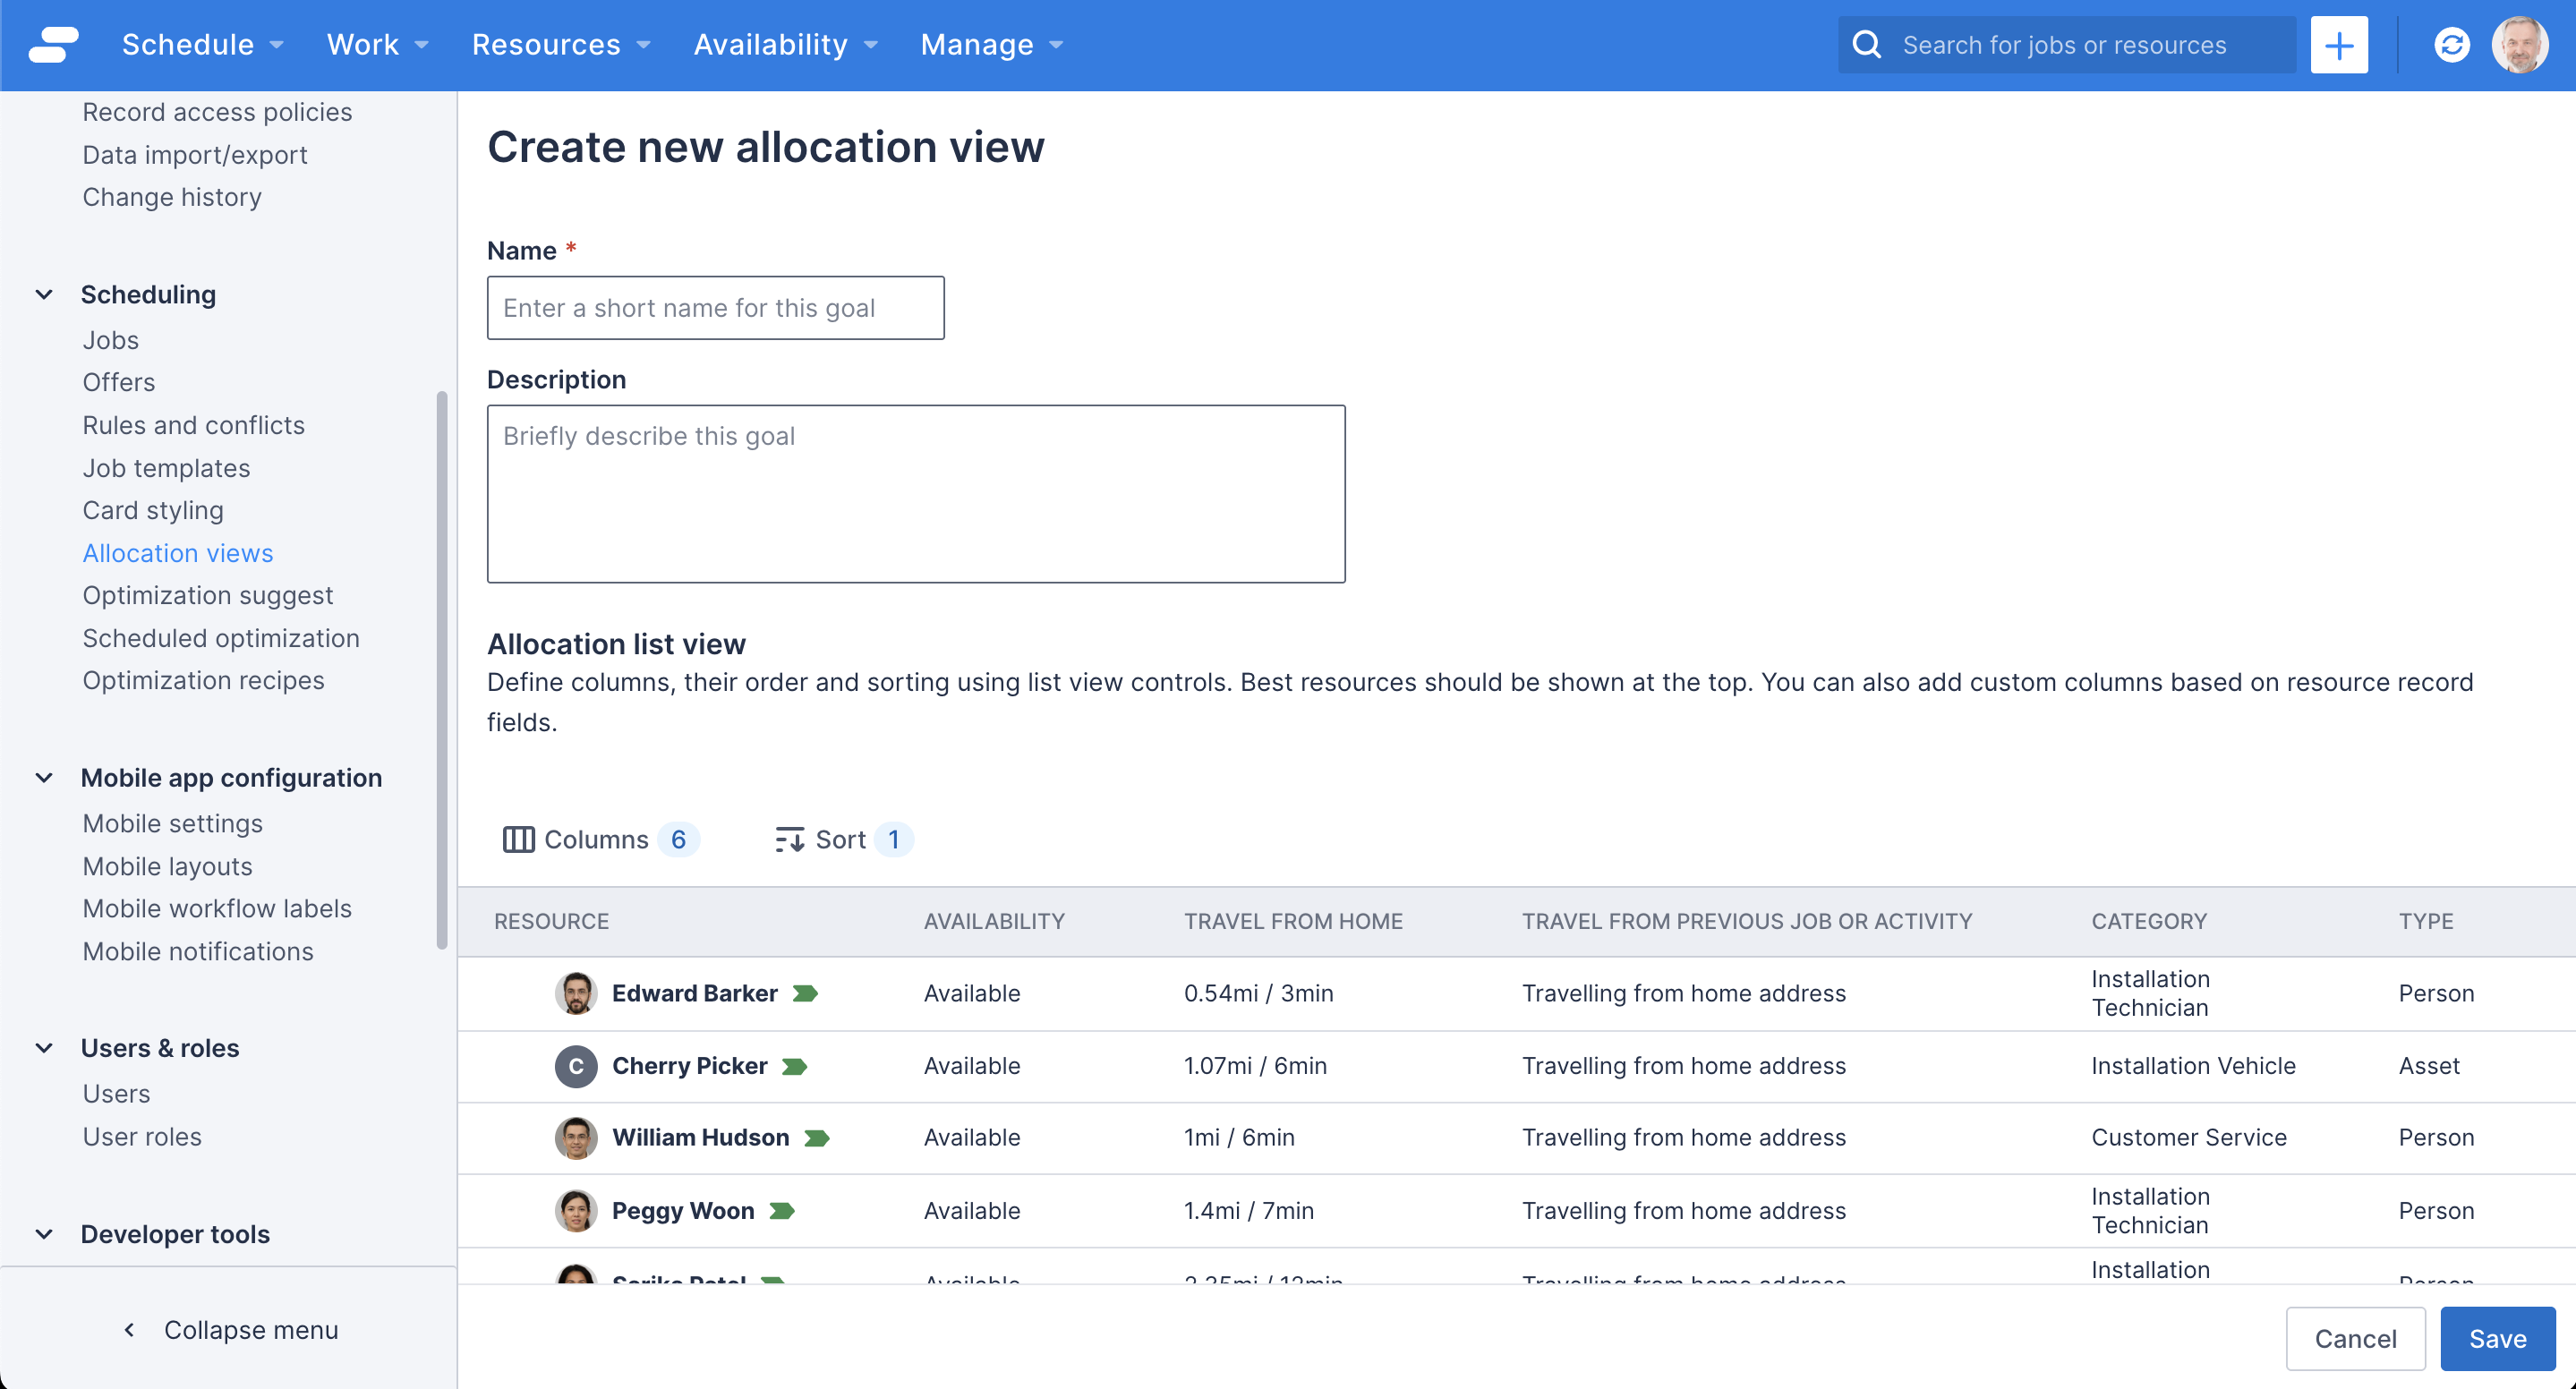
- Enter a name for the view. This name will display in the filter drop-down in the allocation modal when schedulers use the Pulse Allocation Experience.
- (Optional) Enter a description for the view, which will be visible in the Allocation views list.
- Click Columns. The Customize columns modal displays.
- Select the columns you want to appear in the view from the list on the left. Columns can be reordered or removed from the list on the right.
- Click Confirm. The preview will update to reflect your selections.
- Click Sort to open the Sort data modal and select how data must be sorted when the view is in use.

- Click Confirm. The preview will update to reflect your selections.
- Click Save to create the view, or click Cancel to return to the list without creating the view.
Edit an allocation view
To edit an allocation view, do the following steps:
- On the Allocation views settings page, click the name of the view to which you want to make changes. The Edit allocation view page displays.
- Click Columns and then make changes as required.
- To apply the changes, click Save, or to return to the list without making changes, click Cancel.
Specify the default allocation view
To change the view that must be applied by default, do the following step:
- On the Allocation views settings page, click Actions > Set as default on the view you want to be used by default when the allocation modal opens.
Delete an allocation view
You can delete custom views that have been configured in your team. The preconfigured views cannot be deleted.
To delete an allocation view from your team, do the following steps:
- On the Allocation views settings page, click Actions > Delete.
- To delete the view, click Delete, or to return to the list without deleting, click Cancel.
Feedback
Was this page helpful?