Manage assets
View, create, allocate, and schedule assets.
Overview
Physical assets, such as vehicles, mechanical plant, or medical equipment, can be associated with a job. Assets are created in the CRM using a resource type of asset.
View assets
Assets in the Skedulo web app
To view the available assets on the Skedulo web app, navigate to Resources > Assets.
Assets in Salesforce
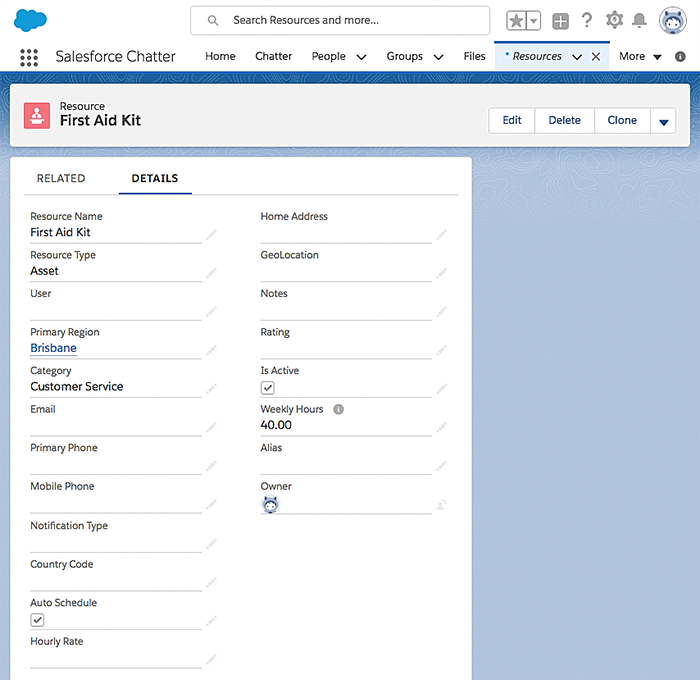
To view asset resources using Salesforce, using the App Launcher, select Resources.
Create assets in Salesforce
To create an asset resource in Salesforce:
- Using Salesforce Lightning, open the App Launcher.
- Select Resources.
- Click New.
- Enter a Resource Name for the asset.
- For Resource Type, select Asset from the dropdown menu.
- Select the Primary Region from the options available.
- Save the new resource.

Related links
Allocate and schedule assets
Schedulers can allocate assets via the scheduling console or the job details view.
Allocate assets via the jobs details page
On the Schedule console:
- Click a job card to open its details page.
- Click the Add resources button
 on the Resources panel.
 - On the Select Resources modal, click the resources you want to add to the job.
- Click Save.
Allocate assets via the Schedule console
From the Schedule console, locate the job that the asset is associated with, then drag and drop the job card into the resource’s swimlane at the time required.
- Show the available assets in the swimlanes by adding the Resource Type, Asset filter in the filter bar.
- Drag-and-drop the job card onto the swimlanes at the timeslot required. Both resources (person and asset) will be allocated at the same time.
- The allocated resources are displayed on the job card.
Feedback
Was this page helpful?