View work details
Important
The new Skedulo Plus mobile app is currently available to selected customers.
Skedulo mobile app users should refer to the Skedulo mobile app user guide.
All customers will be upgraded to Skedulo Plus over time. To find out when your organization will be eligible to upgrade to Skedulo Plus, please contact your organization’s Skedulo Administrator or Skedulo Customer Success Manager.
Overview
In the Skedulo Plus mobile application, a resource can view and interact with their work on the work details screen.
Tap on the work you want to view on the Agenda to open the work details screen. By default, it displays a map with the work location, salient information about the work, and any actions that can be performed. There may also be notes, forms, and other functionality, depending on how your administrators configure the layout of the mobile app. You can perform the following actions:
- View the work details.
- Update the work status.
- Check work contact details.
- Add notes.
- Check off a task list.
- Add signatures and attachments.
View work details
You can check all the needed information for a work item assigned to you. The following screenshot is an example:
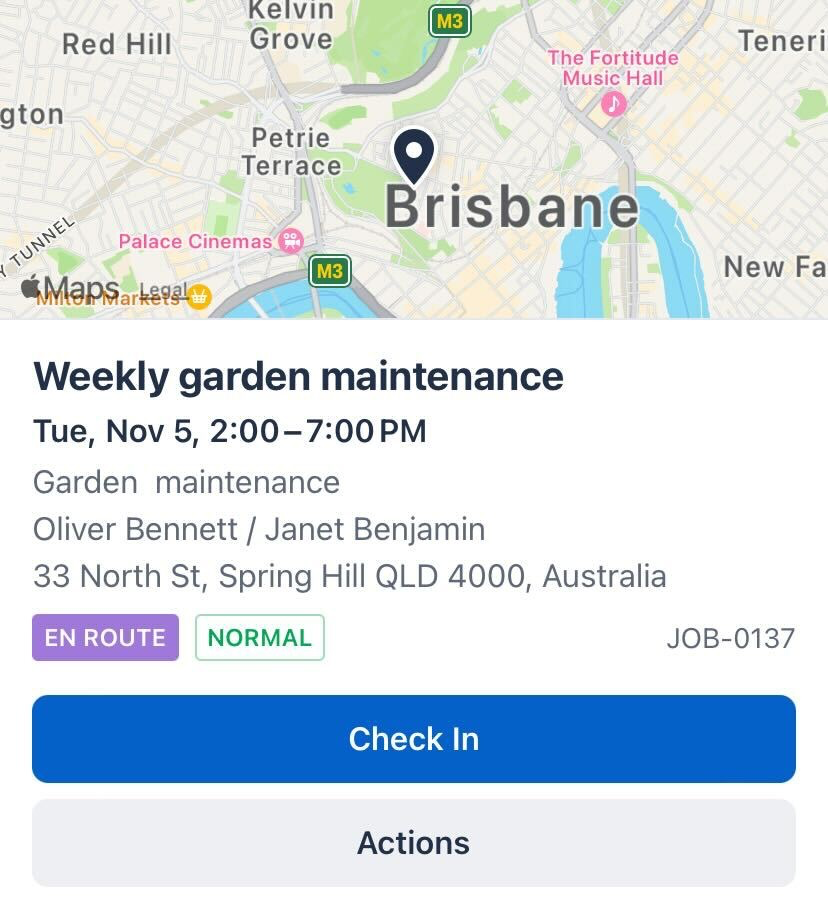
The screenshot above displays the following information:
- Map with work location pin
- Job description: Weekly garden maintenance (up to 255 characters)
- Date and time scheduled
- Job type: Garden maintenance
- Account and account contact: Oliver Bennett / Janet Benjamin
- Address: 33 North St, Spring Hill QLD 4000, Australia
- Job status: En Route
- Urgency: Normal
- Job Number: JOB-0137 (system-generated)
Map view
The map displays your current location and the work location pin. Tap the map to expand it to full view. You can zoom in, zoom out, or drag the map to adjust your view of your job locations. Tap the left chevron button to return to the Work details screen.
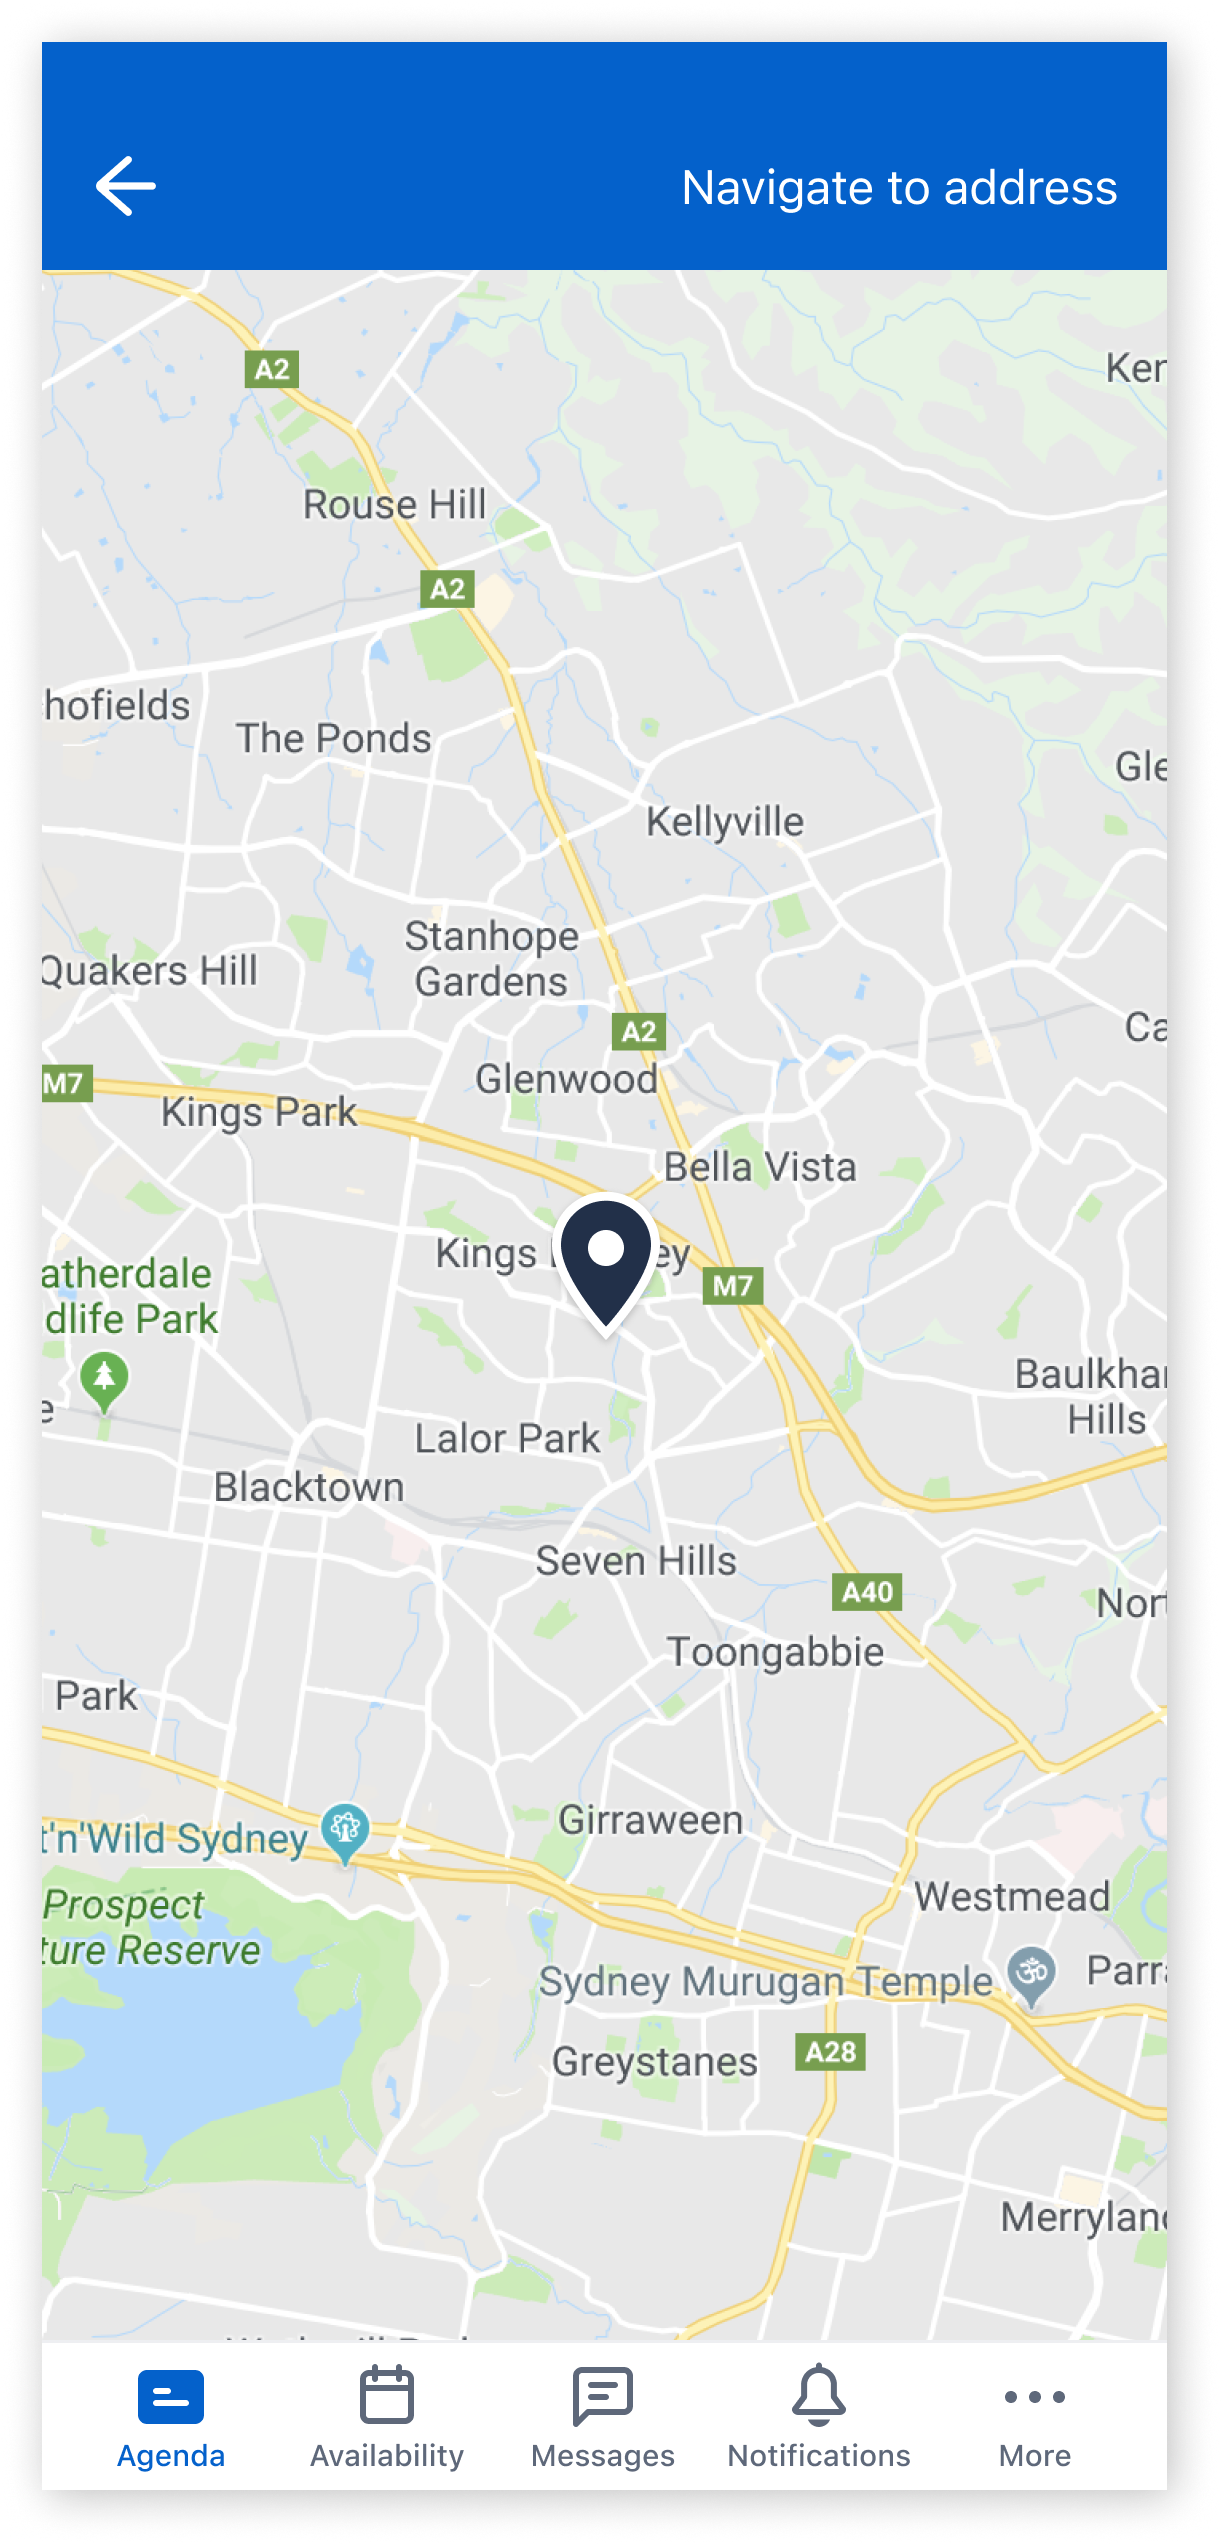
Tap Navigate to address to navigate to the work location:
- Skip Navigation - Start traveling to work without using any map navigation. This option still tracks your travel in the background.
- Navigate with Google/Apple Maps/other apps - Open either Google Maps, Apple Maps (only on iOS), or other apps to get directions.
Timezone alert
Skedulo Plus automatically adjusts to your device’s current timezone. We recommend setting the date and time to update automatically on your iOS or Android mobile device. If your timezone changes, Skedulo Plus will adjust to match your device’s new timezone.
When your device’s timezone differs from the work’s scheduled region time, an alert message will appear in the work details to inform you of the discrepancy.
For example, if you are in New South Wales (AEDT) and the work is scheduled for 9 AM NSW time (AEDT). Then you travel to Queensland (AEST), your mobile device automatically changes the timezone to QLD (AEST).
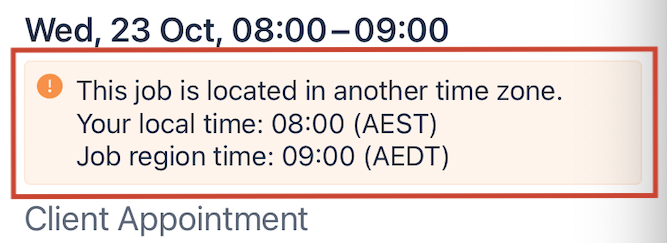
In Skedulo Plus, the work time will adjust from 08:00 to 09:00 to reflect the new local time in Queensland. The alert message will indicate:
- Local time: 8:00 AM (AEST), based on your device’s timezone.
- Job region time: 9:00 AM (AEDT), the timezone where the job is scheduled to occur.
Update the work status
When a work item has been dispatched, you can open the work details screen and tap to either Accept or Decline the work.
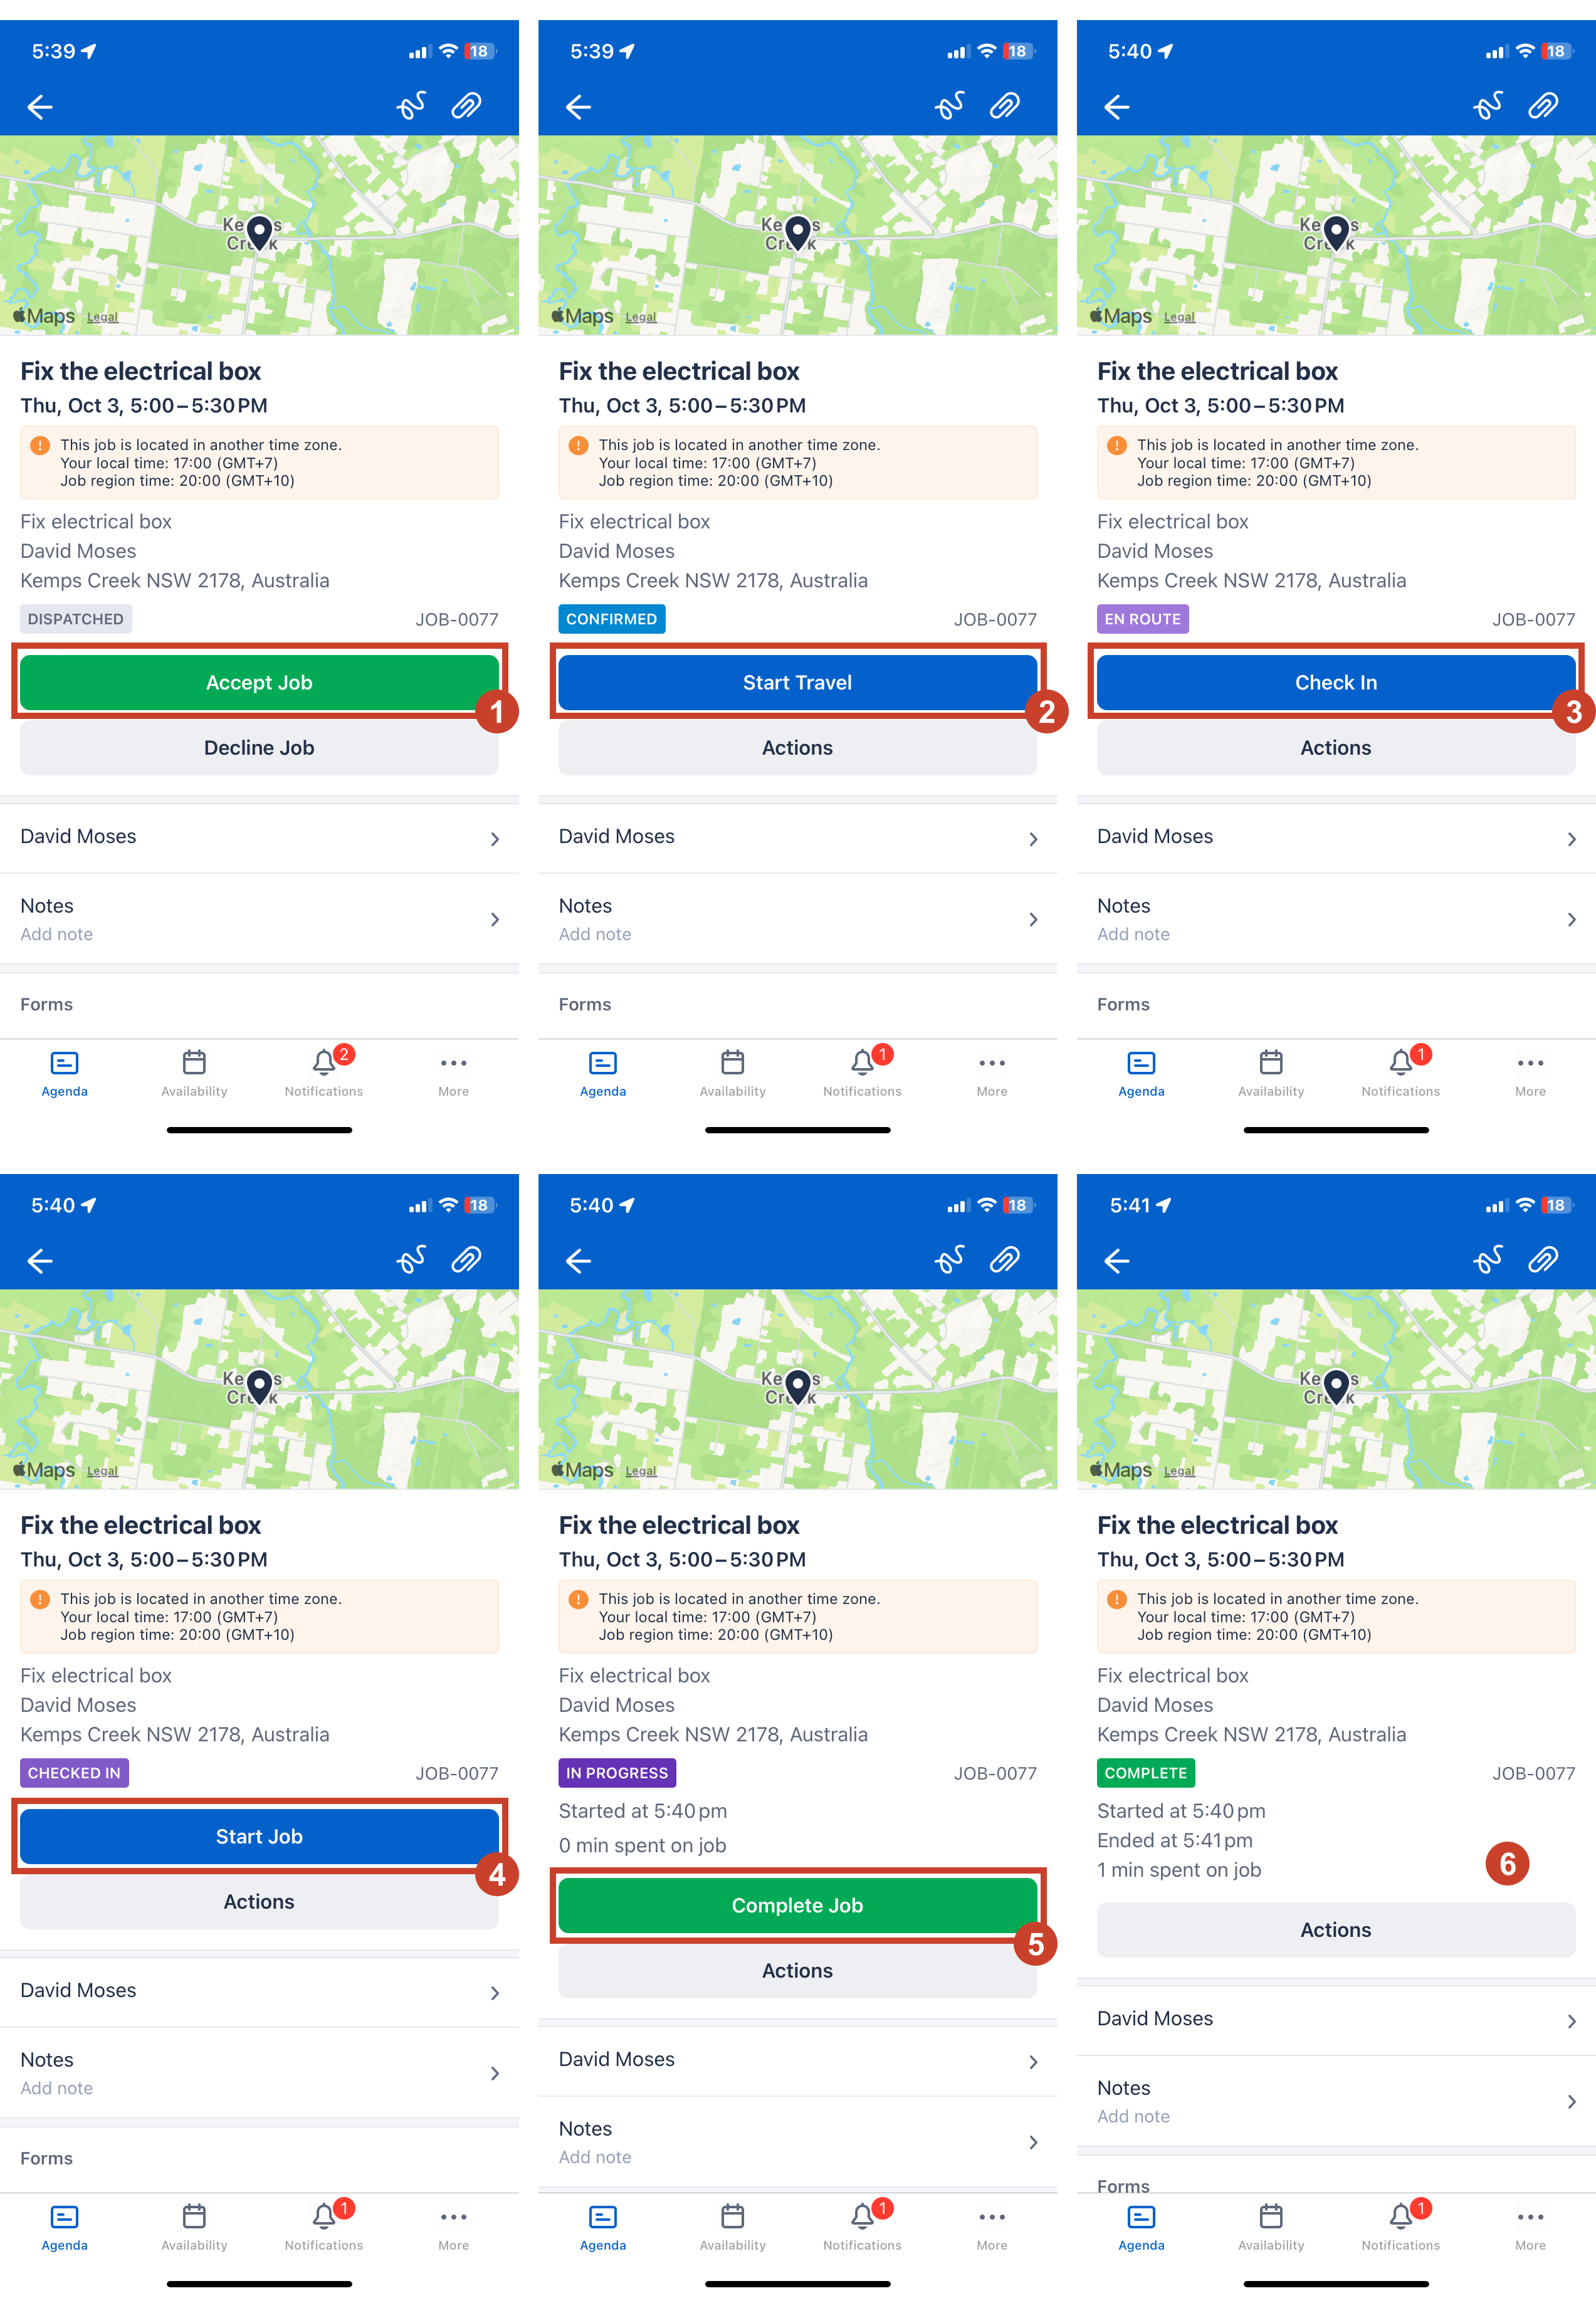
If you accept the work, you can use the same button to update the work status as you progress. The standard workflow is:
- Accept Job - Accept the assigned work.
- Start Travel - Start travel to the work address. The work status changes to En Route after you select a travel and navigation option.
- Check In - Arrive on-site at the work location.
- Start Job - Start the work.
- Complete Job - When the work is finished.
Travel and navigation
The Select a navigation option options menu pops up when you tap Start Travel.
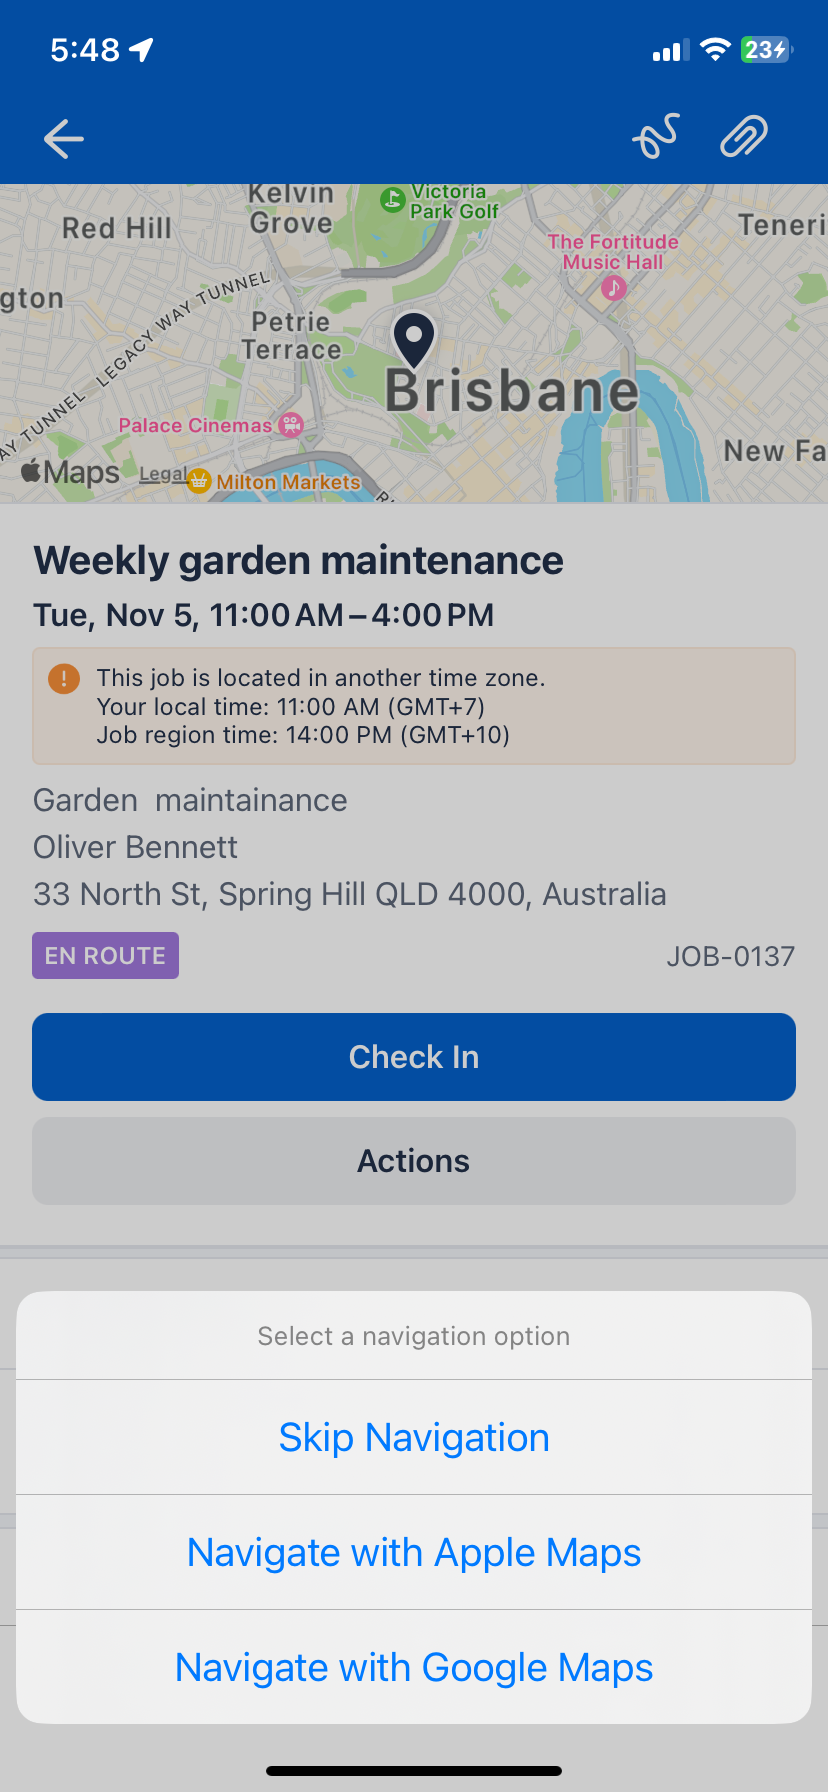
- Skip Navigation - Tap this option to start traveling to the work without using any map navigation. This option will still track travel to the work in the background.
- Navigate with Google/Apple Maps - Tap this option to open either Google Maps or Apple Maps (only on iOS) and begin navigating to the work location.
Work actions
The Actions button becomes available after a work item has been accepted by a resource.
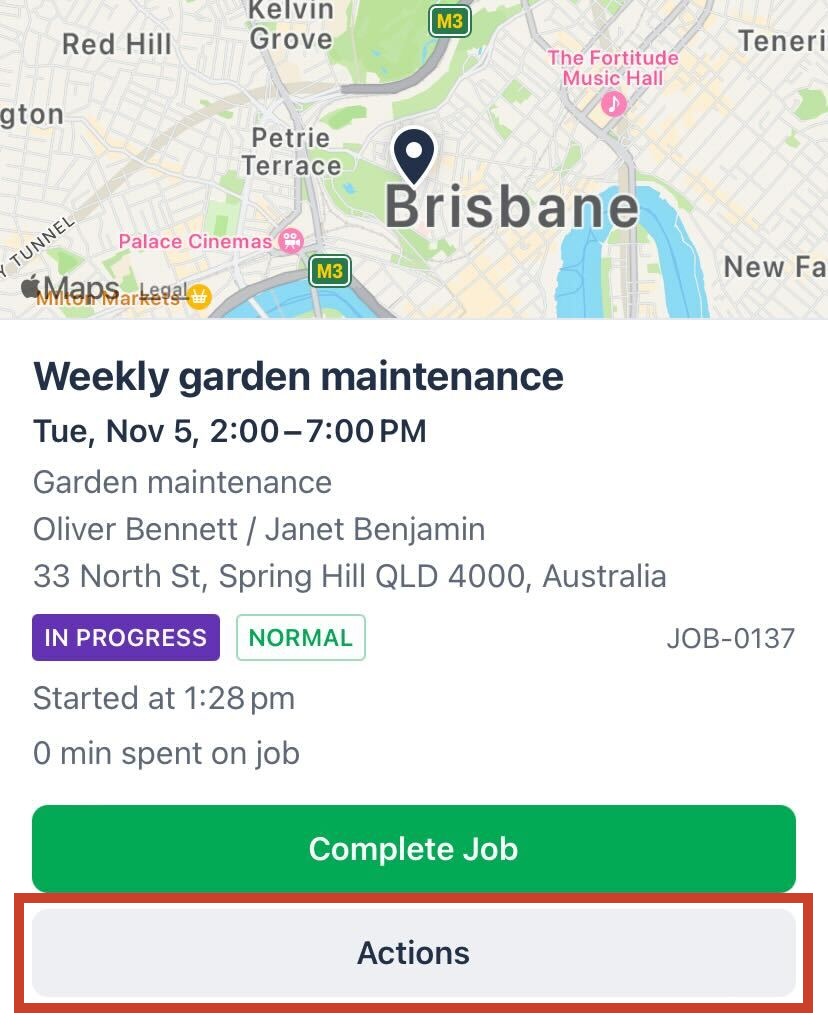
The following work actions are available:
-
Cancel job
Cancel an allocated job that has been accepted. This action only appears when the administrator allows resources to cancel allocated jobs in this settings.
-
Completion notes
Add completion notes to work items at any point. Once you save your completion notes, they can be viewed by a scheduler in the web app. Refer to Add a completion note.
This action only appears when the administrator allows resources to do job completion notes in this settings.
-
Navigate to address
Open either Google Maps or Apple Maps (only on iOS) and begin navigating to the work location.
-
Manage time
Change the time and date of their work allocation transitions. Refer to Manage timestamp.
This action only appears when the administrator allows resources to do job completion notes in this settings.
When a work item has been completed, only the Completion notes action is available.
Work contact details
Tap on the account and account contact name to check their contact details.
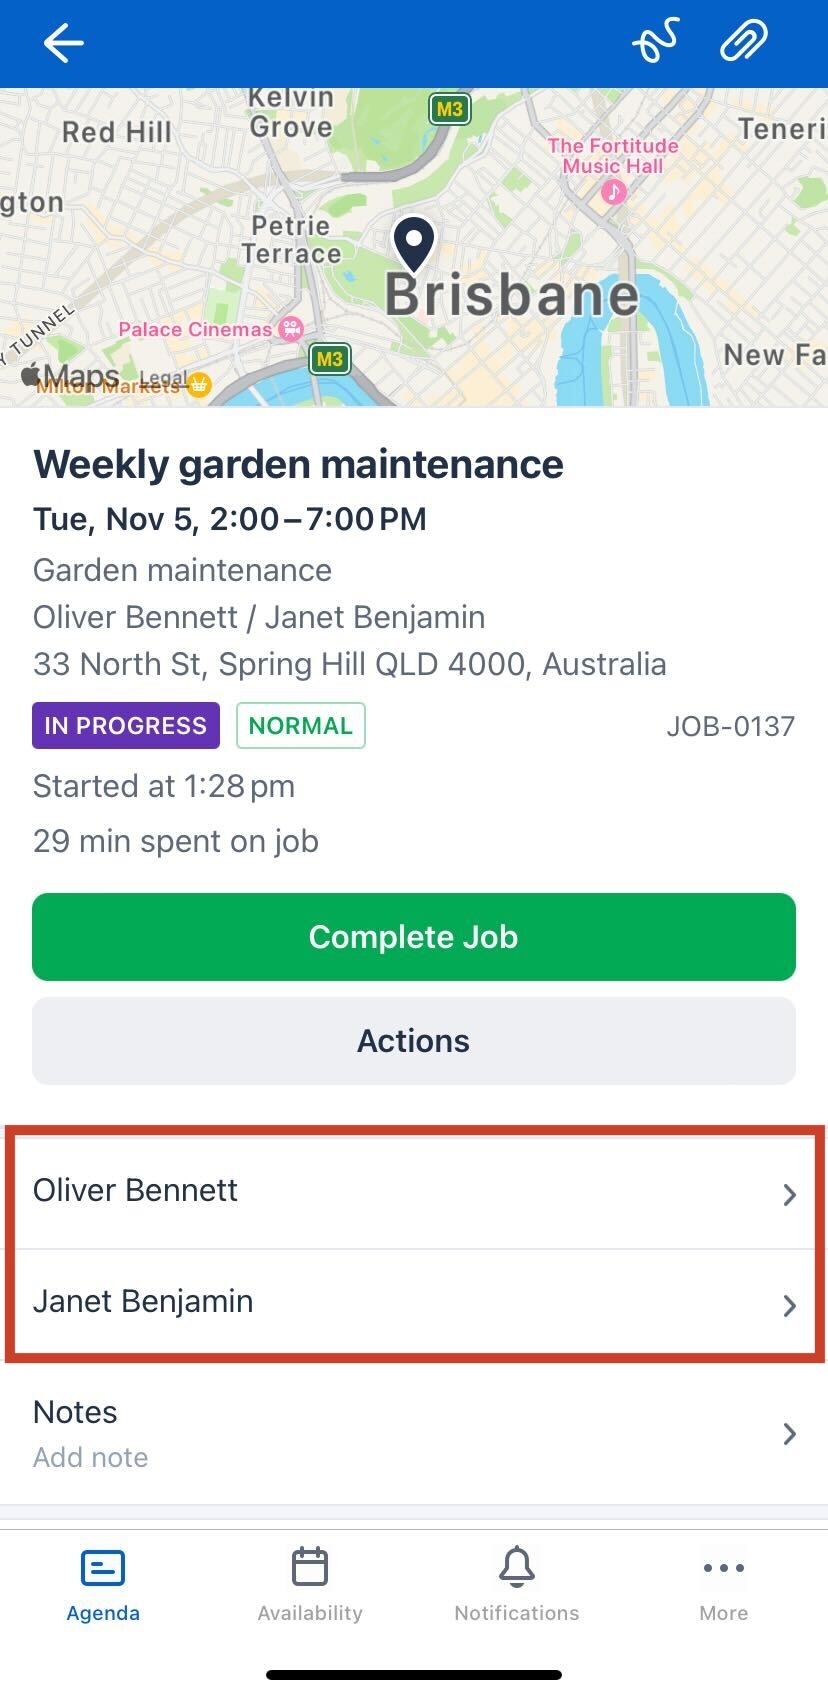
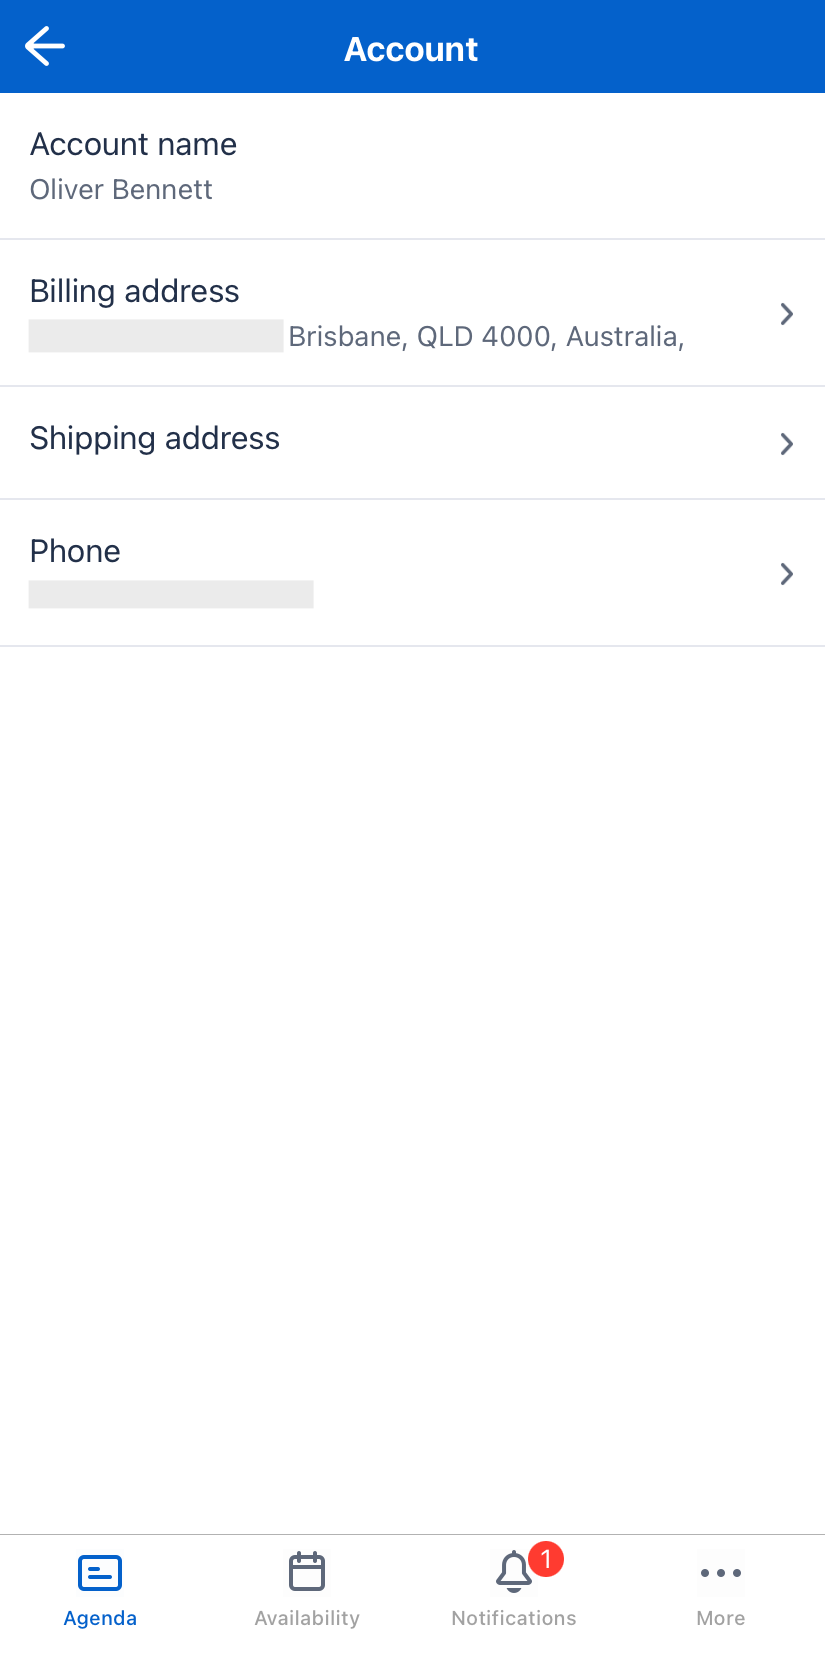
Tap each account or contact detail to send a message, make a call, or get directions to their address.
Add notes
Add relevant notes and work information. This information can be viewed by schedulers using the web application once you save it.
Schedulers can also add notes to a work that can be read by the mobile user. These notes are available even after a work item has been completed, and can be used to provide additional information on follow-up work.
Refer to Add notes for further information.
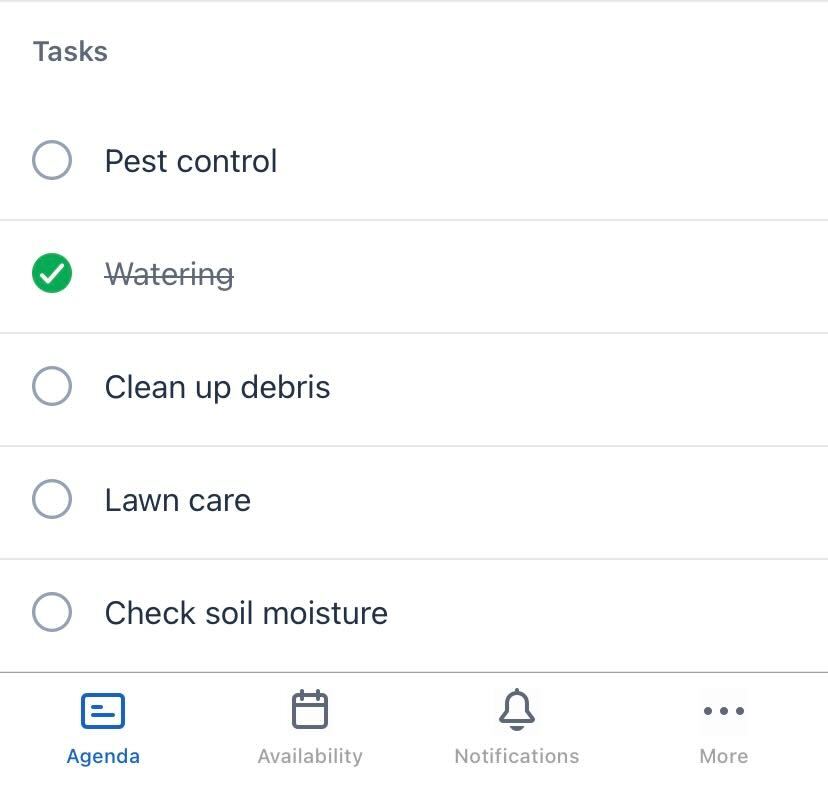
A task list
Some work items have a list of tasks that need to be completed.
By default, all tasks must be marked as complete before you can complete the work. However, this can be set as optional by an administrator based on your team’s needs.
These tasks appear in the Skedulo Plus as a checklist, which you can check off or uncheck them.
Signatures and attachments
You can add signatures and attachments to the job using the icons in the upper-right corner of the work details screen.

Tap the signature icon to add your signature. You can use a stylus or just your finger to write your signature into the signature screen and save it to the work item.
To learn how to add attachments, refer to Add attachments for further information.
Feedback
Was this page helpful?